Tuesday, August 30, 2011

Happy Birthday Sugar Cookies

Photobucket
I made some sugar cookies last night for my friend Stacy's daughters 18th birthday. Her daughter really liked the last cookies I made for them, and of course I was happy to do something fun for the birthday. I enjoyed the colors I used, although being the amateur photographer that I am didn't get the best picture. I took these this morning before I left for work and there wasn't a whole lot of sunlight at 6:45 am, and I didn't have time to mess with it. But the colors were much brighter than they appear. I also love the look of the flat dots on the cookies. This is easily done by adding the dots while the frosting is still wet. Super easy! My piping of numbers could be improved though! I am a little out of practice.
Photobucket

Sunday, August 28, 2011

Slow Cooker Chicken Parmesan

Photobucket
Tonight for dinner it was just me and Brian. It was a nice, quiet evening, but this rarely happens on Sunday nights. We usually head up to his parents house or have dinner with my sisters. Today, however, everyone was out of town. We should have invited some friends over for dinner, but with me headed back to school tomorrow, a low key evening was just what I wanted. To make our laid back evening even better I decided to do a slow cooker meal that was easy to prepare, easy to serve and super easy to clean up. I decided to do a chicken parmesan and sauce in the slow cooker. My mom stopped by this morning on her way out of town and I told her of my plan and she told me she did the same thing just a few weeks ago and the result was amazing. I took some tips from her and was very pleased with how it turned out.

I've written the recipe below, but here's a brief run down of what I did and what I would change for next time. I started with a little olive oil in the bottom of the slow cooker and added chicken breasts that I dipped in egg and then in plain bread crumbs mixed with Italian seasoning. I put mozzarella cheese on top of the chicken then added my tomatoes, sauteed onions and garlic, parsley and basil. Lets talk about the chicken. It was super tender and juicy, but of course the breading wasn't crispy at all, so while it did stay on the chicken and added some flavor this could definitely be skipped. Also, adding the cheese on top of the chicken just got mixed up in the sauce and I think would be better added at the end when serving. I left my stewed tomatoes pretty chunky, but if you prefer you could cut them or use a blending method to make them smaller. I used fresh chicken breasts so I could bread them, but another way to do this faster, if skipping the breading, would be to use frozen chicken breasts.

That's about it, Brian said this was for sure a make again, and it was definitely easy enough. Too bad I didn't have any family in town to partake with us. You missed out! (And going along with not turning on my oven I bought Sprinkles cupcakes for dessert! The key lime one is to die for!)

Slow Cooker Chicken Parmesan

Ingredients
Chicken breasts -as many as you need
plain bread crumbs mixed with Italian seasoning (If breading chicken)
1 egg, well beaten
2 cans stewed tomatoes
2 cans stewed tomatoes, Italian style
1 can diced tomatoes with peppers and onions (or Italian, not Mexican!)
1 yellow onion diced and sauteed
4 cloves of garlic, diced and sauteed with onion
2 Tablespoons parsley
2 Tablespoons basil
1 box thin spaghetti

Directions
Drizzle olive oil over bottom of slow cooker. If breading chicken, thaw and using two different bowls dip chicken first in beaten egg and then in plain bread crumbs. Place on bottom of slow cooker. Open all cans of tomatoes and pour on top of chicken. Add onions and garlic, parsley and basil. Stir gently.

Cook time: on high 3-4 hours, on low 6-7. (More cooking time may be required if using frozen chicken.)

Serve chicken and sauce over spaghetti (or pasta of your choice).


Friday, August 19, 2011

Asian Noodle Salad

Photobucket

This week I went to a Summer Salad Soirée and I wanted to bring a salad that was new to me and my friends. I was feeling like maybe a pasta salad, something with noodles and vegetables. I had been wanted to make an Asian salad, I just needed to find a dressing. So I searched around and ended up using the dressing from Pioneer Woman's Asian Noodle Salad. I included a lot of the same vegetables as she did, but in fewer quantities. I had read a lot of her comments and everyone said the salad made a ton! I wasn't looking for quite that much so I cut back on my vegetables and left some of hers out. You could definitely add more of whatever you like and less of what you don't. There are very few vegetables I think wouldn't be good in this salad. I tried to think of the most colorful ones! My produce department didn't have orange bell peppers, so I used green instead. I cut the original dressing recipe in half because, like I said, I didn't want to make mass amounts of salad. Double what I listed below for more, but I had plenty of dressing to generously coat the salad. A quick tip on the ginger for the dressing: to peel the ginger, just scrape it with a spoon. The skin comes right off. I used my Microplane to grate the ginger, super easy! In the end I thought it was a delightful, light, perfect summer salad. This is the kind of salad my mom would love, so I'll have to make it for her next time she's in town! Enjoy.
Photobucket
Asian Noodle Salad

Salad Ingredients:
1 package Linguine Noodles, Cooked, Rinsed, And Cooled
1 cup sliced purple cabbage
1 whole red bell pepper, sliced thin
1 whole yellow bell pepper, sliced thin
1 whole green bell pepper, sliced thin
1/2 bag bean sprouts
3 whole green onions
1 whole cucumber, peeled and sliced
Handful of pea pods
1/2 bunch chopped cilantro

Dressing Ingredients:
1 whole lime, juiced
4 Tablespoons Olive Oil
4 Tablespoons Soy Sauce
1 Tablespoon Sesame Oil
1/4 cup brown sugar
1 1/2 Tablespoons fresh grated ginger
1 large clove garlic, chopped
chopped cilantro, to taste

Mix salad ingredients together. Wish dressing ingredients together and pour over salad. Mix well with tongs. Note: Dressing will keep for up to three days in fridge before serving, without cilantro.

Source: Adapted from Pioneer Woman

Monday, August 8, 2011

It's been a while...


Photobucket


After months and months of not blogging, I'm not sure there is anyone reading this. But that's ok. I think my mom still loves me. I do have a bit of an excuse as to why I haven't blogged in the past four months. I'm pregnant. And long about April my first trimester sickness started to kick in and the last think I wanted to do was cook. Nothing sounded good to me and the thought of handling raw meats or dealing with fragrant onions or spices was enough to make me head for the bathroom! So my poor husband was on his own for a few months, but did an excellent job in taking care of me. As I started to get over that portion of the pregnancy summer hit. I was done teaching school and feeling well enough to be out and about. My cooking always declines a bit in the summer. Our little apartment gets so hot when I turn on the oven, we stick to very basic dinners.

I'm now 25 weeks pregnant, with a little baby boy, feeling great and so ready to get back in the kitchen. I hate that my summer ends in three weeks, but I won't be waiting until then to start cooking again. And with the cooking will hopefully come a few blog posts a couple of times a week.

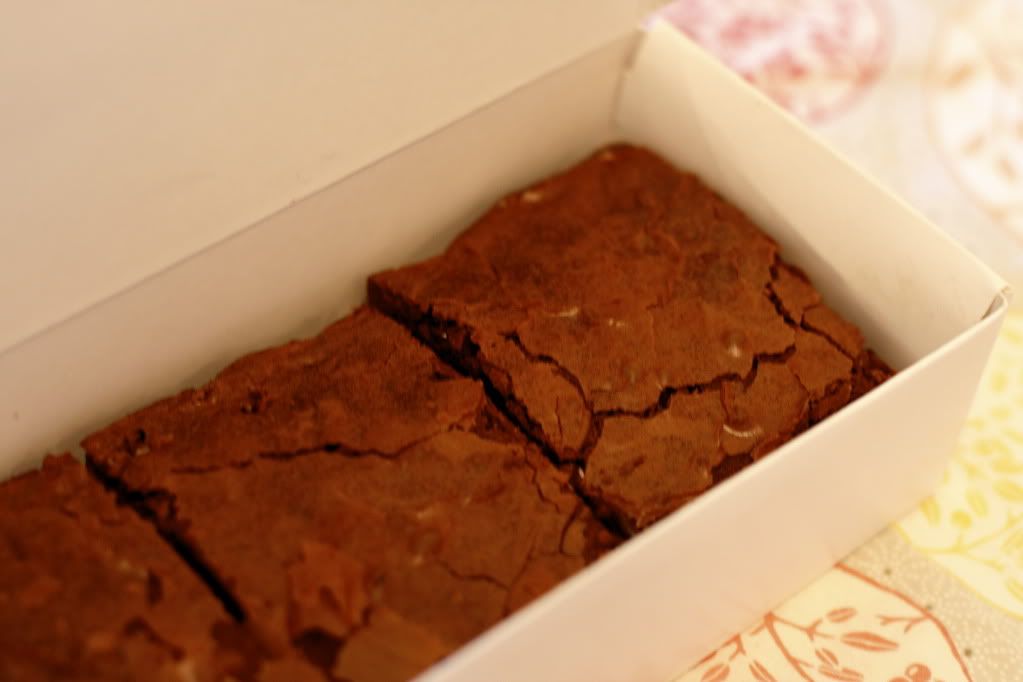
So to get started again, I'll post about homemade brownies. Friday was my father-in-laws birthday, and he doesn't like cake. I know, seems like a crime not to like cake, but I told him I'd make him a non-cake birthday treat. Brian said his dad loves brownies, so I was searching around for some fancy brownie recipes when Brian said he really just likes chocolate. I came across a recipe on Annie's Eats that she adapted from the Baking Illustrated cookbook. I'll admit that I haven't made too many batches of brownies from scratch. Brian loves the Ghirardelli box mix you can buy at Costco that we almost always have on hand. And for how quick, easy and good they are, you really can't beat them. But these homemade ones were almost as quick and the deep, rich chocolate flavor was out of this world. The texture was very soft, but not too cake like. I prefer my brownies chewy, and these definitely were. I also loved that little bit of flakiness on the top.

I used semisweet chocolate chips for the semisweet chocolate, it was easy and what I had on hand. I found I had a bag of milk chocolate chips and thought it would be fun to mix up the chocolate combination next time. And there will be a next time. I loved that the recipe didn't call for anything too special, I didn't have to go to the store before I made these. I love that. And my father-in-law loved them too.

Triple Chocolate Brownies

Ingredients:
5 oz. semisweet or bittersweet chocolate, chopped
2 oz. unsweetened chocolate, chopped
8 tbsp. unsalted butter, cut into quarters
3 tbsp. cocoa powder
3 large eggs
1¼ cups (8¾ oz.) sugar
2 tsp. vanilla extract
½ tsp. salt
1 cup (5 oz.) all-purpose flour

Directions:
Place an oven rack in lower-middle position and preheat the oven to 350° F. Line an 8-inch square baking dish with foil and spray lightly with nonstick cooking spray; set aside.

In a heatproof bowl set over a pan of barely simmering water, melt the chocolate and butter, stirring occasionally until smooth. Whisk in the cocoa powder until smooth. Set aside to cool.

In a medium bowl, combine the eggs, sugar, vanilla and salt; whisk until combined, about 15 seconds. Whisk in the warm chocolate mixture until incorporated. Then stir in the flour with a wooden spoon until just combined. Pour the mixture into the prepared pan and spread with a spatula to make an even layer. Bake until slightly puffed and a toothpick inserted in the center comes out with a small amount of sticky crumbs clinging to it, 35-40 minutes. Transfer the pan to a wire rack and let cool to room temperature, about 2 hours.

Remove the brownies from the pan using the foil and transfer to a cutting board. Cut into squares as desired. Store in an air-tight container.

Source: Annie's Eats

Sunday, April 10, 2011

Newport Harbor Baseball Cookies


This past week I had the opportunity to make some baseball sugar cookies for my friend, Stacy. I work with her, and her son plays on the Newport Harbor baseball team. Stacy was hosting the team dinner before the game this week and asked if I'd make some cookies for dessert. I was more than happy to help her out, and since I had already made baseball cookies once before, I was excited to improve them. She wanted a bigger cookie, I used Ateco 3.5 inch round cutter, so I thought I'd dress them up with a little blue anchor in between the laces, Newport Harbors logo.

It always seems that when I know I'm making sugar cookies I plan out in my head what days I'm going to do what so I don't end up making the dough, baking the cookies, making all the frosting and frosting them all in the same day. On Tuesday night I decided that I was going to make the anchors piped on wax paper like I did these, because it worked out so well last time. I also thought this to be a time saver, as I wouldn't have to wait as long for the frosting to dry before applying them. Well, I must have had some beginners luck with those O's, because I couldn't get one anchor off the wax paper without them breaking. There goes my plan ahead plan. So Wednesday night I bribed my sisters with dinner to have them come help me assess what the problem was. Turns out the process was fine, I had just made the anchors too thin. Brittany actually ended up piping the new, thicker, anchors while I piped the outline and Mikken filled in the centers.

After the white frosting had dried a bit, I piped on the red laces. The next morning I got up early and applied the anchors, which peeled off perfectly. I just used a small paint brush and applied a small amount of water to the cookie where the anchor would go.

Anchor crisis aside, I think they turned out cute. I hope the team liked them! Thanks again Stacy!

Tuesday, April 5, 2011

Buttermilk Syrup

 This past Sunday I had the chance to host my family for Sunday breakfast. Our weekend breakfast tradition is generally waffles, but I decided to go out on a limb this time and try something new. My fabulous friend Sherry has this amazing buttermilk syrup recipe that I just had to share with my family. I knew they would love it, and love it they did. They couldn’t get enough of it. It’s a cinch to make and is so much better than anything bottled you can get.
photo credit: williams-sonoma
I served the syrup over aebleskivers, (or ebelskivers) which are a cute, little, sphere shaped Danish pancakes. I must admit that I didn’t make these. It not because I didn’t want to, but more because I didn’t have the right equipment. I don’t one of these (see above) special aebleskiever making pans. I see them in the Williams-Sonoma catalog and have wanted to try them for quite some time. Alas, this was not that time. So, taking yet another idea from fabulous Sherry, I headed over to Trader Joe’s and picked up a bag of, dare I say, frozen aebleskievers. Frozen or not, these babies were delicious! The best part is you can cook a ton in the oven at the same time, about ten minutes total, and they don’t get cold waiting for the others to cook. Just sprinkle with powdered sugar and top with this buttermilk syrup and you’ll think you’ve died and gone to heaven. If you’d like to make your own, get your self a pan, and then check out the variety of recipes Willams-Sonoma has for making aebleskievers. Enjoy!
Buttermilk Syrup

1 cube butter
1/2 cup buttermilk (low or reduced fat works also)
1 cup sugar
1 tsp vanilla
Bring above ingredients to a boil and make sure sugar is dissolved.

Add 1/2 tsp baking soda and continue stirring.
(Adding baking soda will double the amount of syrup by foaming and might spill over onto the stove. Use a pan is that double the size you think you would need to avoid a mess!)

Left overs will keep in fridge for a couple weeks.

Thursday, March 24, 2011

Oregon Ducks Cupcakes

The same weekend I made all those wedding cupcakes I was asked by another friend at work to make cupcakes for her son's baseball team party. I asked if there was a theme and she said their team was the Oregon Ducks and their colors were yellow and green. Apparently all the teams in the league are named after colleges. I took that and ran with it. I searched out the Oregon Ducks logo on the internet and liked the simple "O" they used. The night before, when I was waiting for the wedding cookies to dry, I came across a video that showed how to pipe royal icing onto wax paper, that could then be used to top cakes or cupcakes. That was in the back of my mind, and since I'm not that great at freehanding logos just yet, I thought this would work out perfectly for the Oregon O.
  
I printed out some Os and taped them to the table. I took wax paper and placed it over the top. As I finished one O, I would move the wax paper around and pipe several Os on the same paper.
 First, trace the shape, as if piping the outside of a cookie.


 Then fill the shape in. I used the same consistency of royal icing to pipe as I did to fill. My frosting is on the thicker side, I using the ten second rule to gauge. I wanted to make sure my lines would hold. 
These needed to dry overnight, just like royal icing on a cookie would. The next morning I frosted the cupcakes and placed the O on top of the wet frosting. I thought they turned out fantastic! The best part was, a guy friend walked in and said, "Oh, Oregon cupcakes, cool." They were recognizable, mission accomplished! I love this little cheating way of getting the logo to match almost exactly. I will definitely use this technique in the future. Even if I do get a little better at free handing, I thought the royal icing decorations were so fun as cupcake toppers.
Just a few notes on the actual cupcakes. I used Barefoot Contessa coconut cupcakes for the cake, just without the coconut. It was the perfect white cake.  For the frosting I used a new buttercream frosting recipe I found on Food Network. I loved it! These was the perfect combination of frosting and cake.

Related Posts with Thumbnails